Tuesday, February 19, 2008

SUBWAY STATION

(CLICK TO SEE LARGER IMAGE)

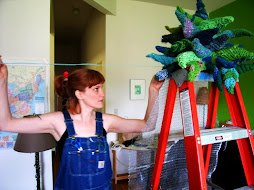
Okay here's drawing #1 (probably of many) having to do with the subway station. This is what I'm thinking: at the entrance a cardboard or canvas (or maybe Tyvek) "wall" begins angling up. Meanwhile, the floor has a drawing of stairs on it--not sure how to make this both light and durable, but maybe Tyvek is the solution again. This is so that participants appear to be going underground. When the wall reaches its height, it levels off and becomes the doorway of a subway car.


Here's what I know about the subway car:

1. You can walk into it (like it's a wee room to go inside)
2. You can look out the windows into the underground
3. The pictures in the windows will "go by", meaning that they will cycle through on a scroll of some sort, and this scroll will be operated somehow by participants.

Here's what needs figuring out:

1. Does t he car have seats, or is it more like a popup book--like different levels of things in relief?
2. Should the car "move" when the scroll is turned? How can that be accomplished? It would be real nice if there was some sort of rumbling happening.
3. Should the windows be operated from outside or inside the train car? One Idea is that the crank exists on the other side of the car wall, facing another part of the park. I'm thinking the wall will face the North Woods. It'd be great to think of a creative way to incorporate the crank into the woods so that people crank it not knowing what they're doing, and the people in the subway car just happen to get a ride when this happens.

I'll draw close ups of the windows later on.

Friday, February 15, 2008

GREAT LAWN


Here's what everyone sees the minute they set foot into the gallery or whatever room the installation happens to be in. It's a giant rolled-out sod lawn. Its in a gilt picture frame and there's thick plastic sheeting that goes under the dirt to protect the floor and catch the water. On the lawn will be a bunch of picnic baskets holding picnic blankets and lots of goodies. Participants can open the baskets and eat whatever's inside. This is also where everyone sits for the performance. If the room isn't big enough, there can be a smaller lawn closer to the stage and participants who don't want to sit on the grass can stand or sit behind the lawn.


I want to show you this picture of an awesome use of a harpsichord for an invalid desk. I'm supposed to lay down for two weeks, so Jad moved the chord over the sofa for me. Maybe I'll practice some piano music while I'm horizontal.

Wednesday, February 13, 2008

IN THE BRONX HOSPITAL


I had to go back to the hospital Monday night because of my recalcitrant Cauda Equina Syndrome. Fun times. This is a picture of me looking down at my brand new IV port. The nurse who put it in was extra gentle. I had some bruisers the last time I was there.

Here I am in a hallway waiting for my Xray. In the halls outside of the Bronx ER they have these really cool mirror balls attached to the ceilings, so that the orderlies don't crash into other gurneys when they're coming round a corner. I got parked right under one of them. I wanted to draw me drawing myself (like a discount Escher!) but by the time I got around to drawing myself on the gurney I was way too small. When I learn how to draw better, maybe I'll redo it.

Anyway, it was 4:30 AM by the time I was wheeled out into the hall, and I was glad for a little quiet; emergency rooms are loud. I finally got admitted at 9 the next morning. The hospital was full.

The whole experience was a success because I got out without being cut open again. And I got a lot done on my yarn tree. By some stroke of luck I was put on the orthopedic floor's only private room. I knitted a bunch of tiny trees to lay around. The nurses all wondered what I was making. I stopped explaining it after awhile because they just weren't getting it; I said I was knitting wee hats. Anyway, it was nice to see some of those nurses again. Especially the one named Anna.

They let me out this afternoon, so I'll resume regular posting tomorrow.

Saturday, February 9, 2008

LEAF POSTCARD TREE

(CLICK ON PICTURE)

Here's the Postcard Leaf tree. Each of the "leaves" are photographs of leaves from Central Park printed onto plain, white postcards. The postcards can be removed from the alligator clips (people can take them).

The alligator clips are attached to plastic coils, like you might attach keys to, or sunglasses. The plastic coils are attached to Tyvek covered stiff wire "twigs." The Tyvek is laser printed with twig photographs, and sewn with big, obvious stitches over the wires (a little thicker than coat hangar weight), so that they look like twigs--but close inspection reveals that they are textureless photos.

The bark of the tree will likewise be photographed Ponderosa Pine bark cut out and layered onto the tree trunk. Not sure what Ponderosa Pine bark looks like?

It's kind of jigsaw puzzle-y. So we take it a step further and cut out the printed Tyvek into puzzle shaped pieces and layer them on. I think glue will do here. No need to sew it on.

But back to the top of the tree...The overall effect with the coils and the wires is that everything kind of springs and waves when people walk by and touch it. It might also be fun to employ a low setting fan to wave the leaves around.

One comment is that we might want to have stamps and pens available so that participants can write to friends. Then we can take all the cards and post them from NYC. Maybe one or two of the cards can already have things written on them..."The Park is beautiful this time of year. I wish you could see it!" and etc.

One thing that I think should be different than in the drawing is this: There should be WAY more cards, and the whole thing should be a kind of Willow effect like this:
One note is that I'm pretty sure there are no Willows in Central Park, but neither are there Ponderosa Pines, and since this is an imaginary hybrid of the two (along with some Tyvek genomes thrown in), I'm just not going to worry about it. There's gonna have to be a good amount of suspension of disbelief granting around here.

Friday, February 8, 2008

A BETTER TEA TREE IDEA

I like this idea better. It's really Austin's. Hang the cups from the umbrella tree, he said. Great.

I think we can even put the more inside--attach the hangar holders to the insides so that we'll have a place to put the saucers. Gonna need to find a way to make them pretty secure--no one wants a whole bunch of broken china on the gallery floor.
I need a break from the Tea Tree.

Thursday, February 7, 2008

TYVEK TEST: POSITIVE

I made this bear with a FedEx envelope, thread, and yarn ends (for stuffing). He's about 8 inches tall. I made him fairly one-dimensional because I wanted to just spend an hour or two--he was an experiment, after all-- but I really like him. I'll probably make him a scarf and hat. He's pretty happy in the tiny forest I'm making for the Yarn Tree.

I would like to sing the praises of Tyvek as a fabric. It sews like a dream, is stronger than fabric, and wrinkles up to a beautiful old paper texture. I can't wait to make the pigeon. I'm going to have to purchase an alligator clip and find some used airmail envelopes. It's essential that they've been posted; I want the return address to appear under her wing, and possibly the stamp too. Of course the airmail stripes will appear as the stripes on her wing--like a rock Pigeon:I think I'll staple together a pattern sometime this week before I start in on the real pigeon, which (because of hand-stitching) will likely take a long time.

In case you haven't read the blog about this pigeon, here's the plan:

(CLICK ON PICTURE)(CLICK ON PICTURE)

I'm hoping to find some manila Tyvek envelopes as well, to make her feet with.

My next Tyvek experiment will be to see if it can be printed on in a standard jet or laser printer. If so, I might use it to reproduce bark patterns for another tree.

Wednesday, February 6, 2008

TEA TREE--MORE THOUGHTS AND QUESTIONS

Here's more on the tea tree. I did this drawing of the whole deal, but since then I've had some second thoughts about the overall shape, which I'll explain later.

(CLICK ON PICTURE)(CLICK ON PICTURE)
The overall structure and idea is there (teacups on hangar racks on chicken wire with old fashioned napkins sticking out to cover up the blank spaces). What I'm not so keen on is the lampshade shape of the top of the tree. I think I want it to be more like this:

(CLICK ON PICTURE)
(CLICK ON PICTURE)

Here's a detail of the inside tea-dispensing part of the tree (without the foliage):

(CLICK ON PICTURE)

More Questions and Comments:

1. This is looking too precious in the Alice and Wonderland, girly type of way. I want it to be more Terry Gilliam-ish. Like Brazil only brighter. Maybe the cloth napkins (these should be thrift-store) are not the way to go for foliage. Maybe there's something that can be juxtaposed (something more Kafkaesque, or macho or scary) with the ladylikeness of the tea service. I'm going to sleep on that. Maybe someone has an idea?

2. I'm not sure chicken wire is the way to go for the support of the foliage of this tree. It may need to be partly attached to a wall for stability. That may provide the support for a more uneven shape that'll be much better looking. It may also add a nice pop-up book feeling that can be employed throughout the exhibit.

I got a bunch of Tyvek today that I'm going to test for pigeon-making. I think I might make something simpler first--I'll take a picture of it and show when I'm done.

Monday, February 4, 2008

TEA TREE: CUP HOLDER DETAIL

Today just a short post starting on my favorite tree, the Tea Tree.

All I have so far is the hangar supports. They should all be glued or welded together to form the top part of the tree. It looks like this:

(CLICK ON PICTURE)
(CLICK ON PICTURE)

All the teacups should be thrift-store and all different. I'll probably have to get around 100. It could be that it's easier and better looking to get two or three different types and mix and match from there. Not totally sure which way to go. I guess we'll see what the thrift store yields.

Here's what's supposed to happen: Participants take a cup and saucer from the "leaf" part of the tree and put it into a hole in the trunk. Hidden inside the leaf part of the tree (which will be the net of hanger supported teacups) is a tea maker, which dispenses tea into the waiting cup.

Next to the tea tree will be a cream-and-sugar tree, but I'm getting ahead of myself.

I'm having some challenges working out how to do the innards of the tree. They are:

1. I want to find the right machine to make/dispense/keep hot the tea. My dad might have a line on something... Originally I was thinking one of those old giant coffee/tea dispensers that you might see at a truck stop or community college maybe 15 years ago. But they are too heavy and prohibitively expensive. They'd also be hard to cover in a tree-like way.

2. I also want a lever or a pressure plate so that the tree knows there's a cup there and can begin to dispense. My dad thinks that a standard coke-dispensing lever might work...

3. I want to figure out a cool way to obscure the machine inside the tree. The hangars/teacups make a nice form, but it's very see-through. I want to stuff the bowl of the tree with something that makes it look more tree-like.

4. The trunk is also unsolved at this point. I think I want it to be a little more realistic trunk-like than, say, the apple tree. Austin/Caralie, do you have any ideas? Dad?

Saturday, February 2, 2008

APPLE TREE


This little movie is off-topic. Jad and I made it today...we're learning After Effects.

NOW BACK TO OUR REGULARLY SCHEDULED PROGRAMMING

Today we're tackling the Apple tree, which has been giving me fits. Here is the original drawing for it:

(CLICK ON PIC)
(CLICK ON PIC)

Notice the wee Lady Apple that will be in the bowl of each soup spoon. These are the most wonderful two bite apples in the world. Plus they are real pretty--yellow and green and pink!

All the ladles and soup spoons are stainless steel and thrift store mismatch. The soup spoons will be welded or glued to the bottom of the ladles in twos and threes.

The light inside the tree should go on at "Nighttime." At certain times night will fall in the room and the lamp posts, Chinese lanterns, fireflies and certain trees will turn on.

There are two things wrong with this drawing:

1. The ladles need to have gifts in them too. I was thinking that they might have big apples--maybe Pink Ladies (in keeping with the Lady theme for apples). Or maybe we can fill the bowl of each ladle with water and put flowers in. Apple blossoms would be great, but only available in spring, and not really a good cut flower. Maybe some other sort of flower--or something else entirely. Austin and Caralie (or anyone else), any ideas?

2. I don't like the shape of this tree. Maybe instead of just having a lamp stand and putting the ladles and spoons around it symmetrically...Maybe I should make a form out of chicken wire or something and irregularly hang the ladles from it. I think that will look much better.

Here's the base of the tree--a lamp stand covered with bamboo grapefruit spoons:

(CLICK ON PICTURE)


INGREDIENTS LIST:

1. Lamp stand (this one is too ornate, but you get the idea).

2. Bamboo grapefruit spoons (to cover the base of the lamp stand)


3. Many stainless steel ladles (mismatched)
4. Many stainless steel soup spoons (mismatched)
5. Lady apples to put in the soup spoons (they are about 2 inches tall)
6. Pink lady apples for the ladles (or maybe flowers?)
(Pink Lady apples are large apples)

Friday, February 1, 2008

MRS. ARLENE PIGEON-PANTS

(Arlene's a modern pigeon and decided to hyphenate.)

Take a look at this pigeon nest that's on top of the Sweater tree (see yesterday's post)


(CLICK ON PIC)(CLICK ON PIC)

The nest at the top of the Sweater Tree is made of #2 pencils. The bottom layer has the pink eraser side sticking out. On the top layer are loose, sharpened pencils which participants use to fill out order forms which will be in one of the sweater pockets nearest to the nest.

Don't forget (from yesterday) that the Sweater Tree uses a ladder as its base, so that participants can "climb" the tree to reach the nest high on top of the tree.

Back to the nest: Also inside the nest is a pigeon. The pigeon is made of Tyvek air mail envelopes--an already posted one so that the stamp and address are clearly visible. The Pigeon's beak is made of an alligator clip. Participants can fill out order forms and put them in her beak. On the pigeon's back is a coat hangar top that attaches to a nearby zip line. Participants can spread the pigeon's wings and attach her to the line and send her across the room and into the hands of a waiter at Tavern on the Green (more on that later) who prepares the order and has it ready by the time the participant reaches that side of the room. Orders for Tavern on the Green are ONLY by carrier pigeon.

Here's a diagram of the pigeon:
(CLICK ON PIC)(CLICK ON PIC)

Here's the pigeon on the zip line:
(CLICK ON PIC)
(CLICK ON PIC)

PROBLEMS TO SOLVE AND QUESTIONS TO ASK:

1. Can you sew Tyvek? I'll have to make sure you can. If not, must find alternate way to make this pigeon work.
2. Not sure how to make the pigeon return on the zip line. I can't have the waiter running the pigeon back all the time. I'm gonna ask my dad about this one.
3. The wing extension might be a little tricky. I'll have to mess with it. Also it may make the pigeon slow down halfway across the room. This'll need some tinkering.

INGREDIENTS LIST:


1. #2 Pencils
2. Tyvek Airmail Envelopes (for the pigeon skin/feathers)

3. Alligator Clip (for the pigeon beak) 4. One of those old rulers with the joints (for the wings)

5. Zip line

(just like this, but pigeon-sized)